Send mail via Gmail using XOAUTH2
This guide show the easiest way to set up a client id and secret for sending mail via Gmail using XOAUTH2. We will use the Authorization Code flow for obtaining the access (and refresh) token, this means that a kind of user interaction is required. A new refresh token can not be requested without the user. This guide works for personal Gmail and Google Workspace Gmail.
Create a project in Google Cloud Console
Open https://console.cloud.google.com, click in the upper bar on the project selector.
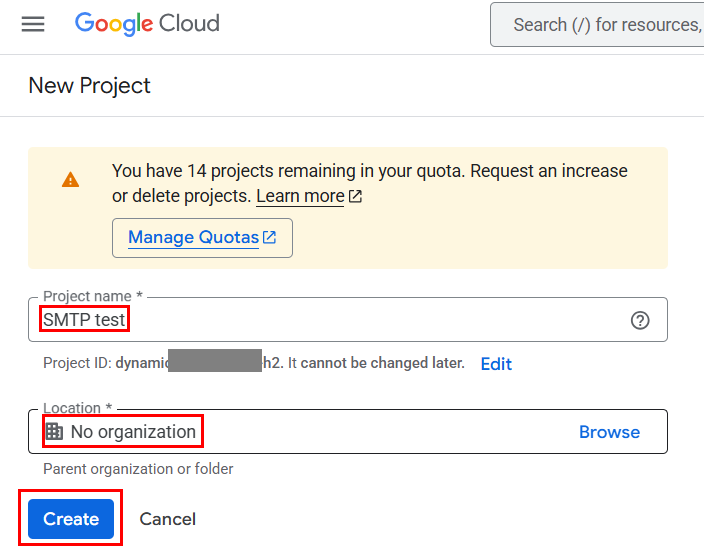
Click New project.
Give your project a name, usually the same name as your website or application. If you use a multiple organisation structure in Google Cloud Console also assign a location.
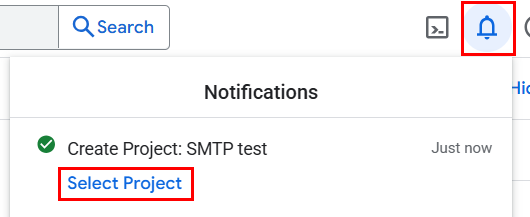
After click Create the project will be created. This can take some time. Click on the notifications button in the upper right corner to see the progress. When finished click Select project.
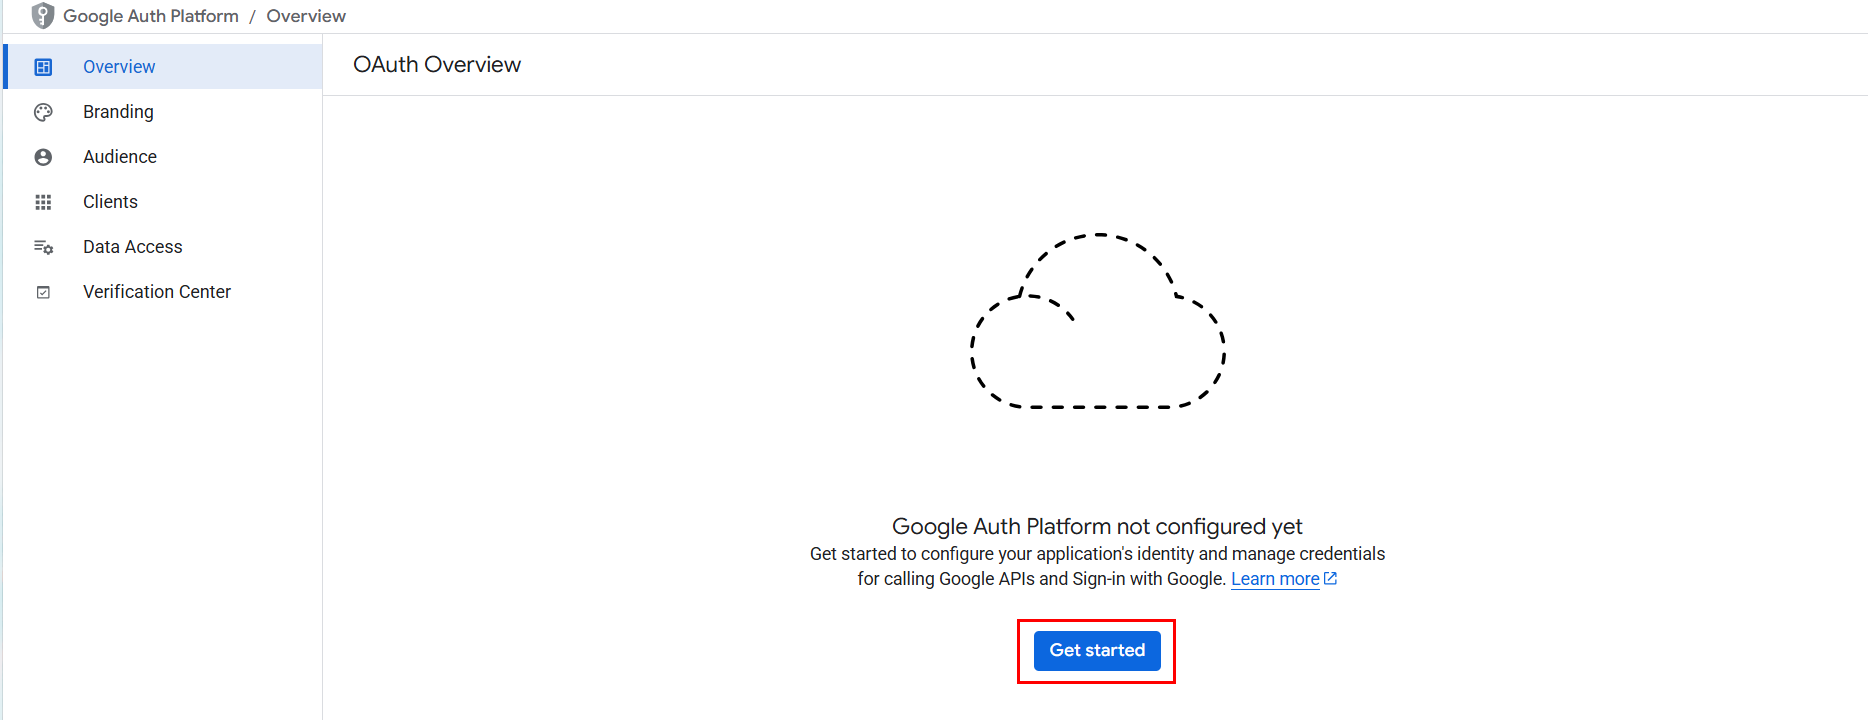
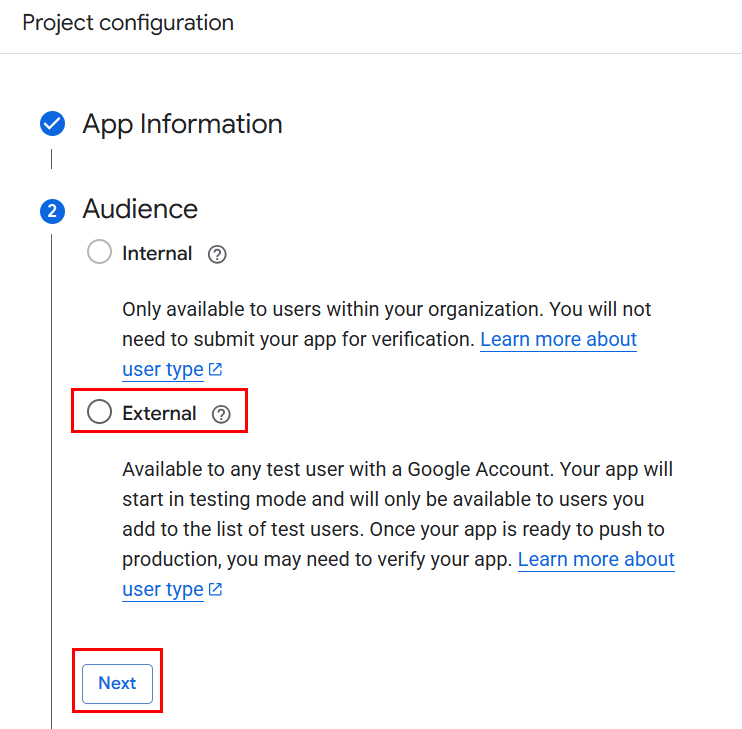
In the menu (hamburger button), go to APIs & Services > OAuth consent screen.
Click on Get started.
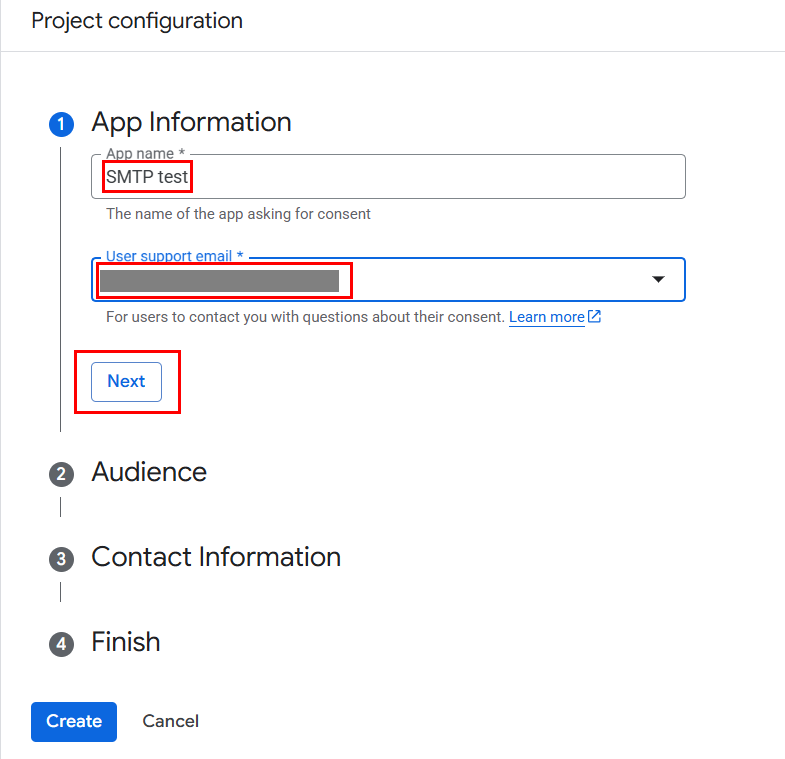
Fill in your application name, this can be the same as your project. Fill in a support e-mail address, this will showed to users who are setting up the application for sending mail, if this is for a (WordPress) website than it will be you.
When using Gmail inside a Google Workspace setup here you can choose for an internal application. Internal applications don't need to be reviewed and verified by Google. For personal Gmail accounts choose Enternal. If you only will use this for sending mail from a website you can skip the review and verification proccess too.
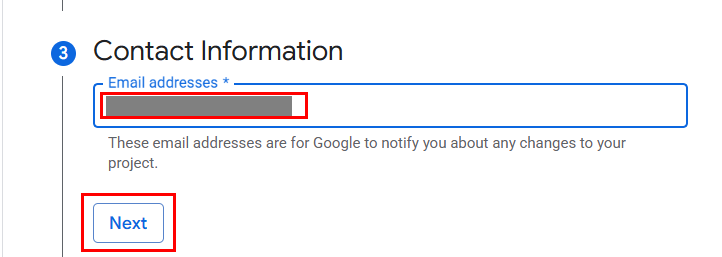
Fill in a contact e-mail address for Google to reach you when something is wrong or will be changed within theire platform.
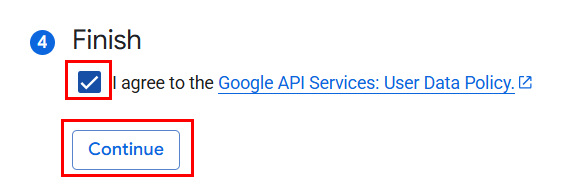
Agree with the User Data Policies.
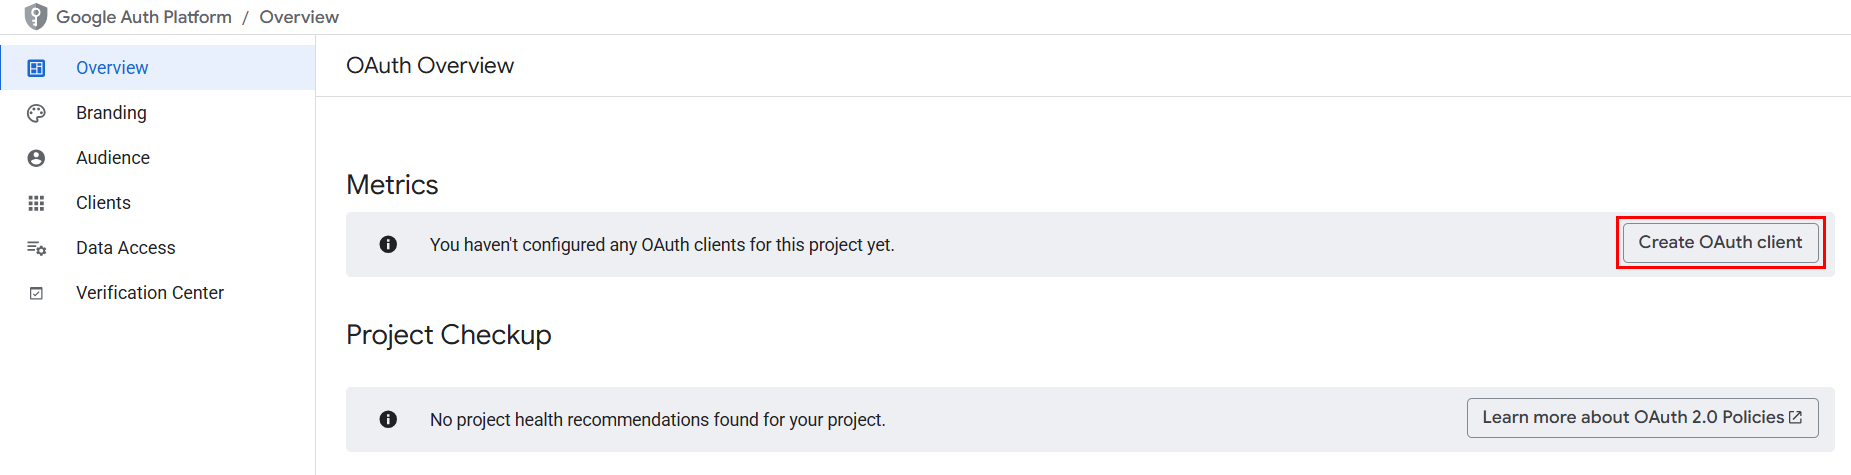
Click on Create OAuth client.
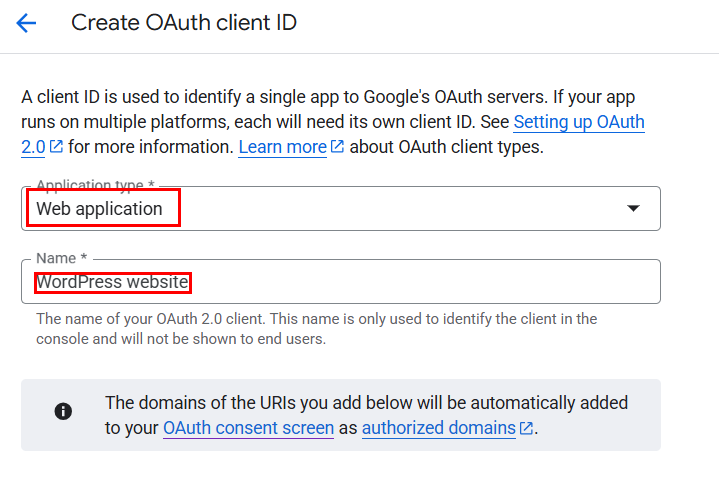
Choose Web application and give it a name, this can be the same name as your project.
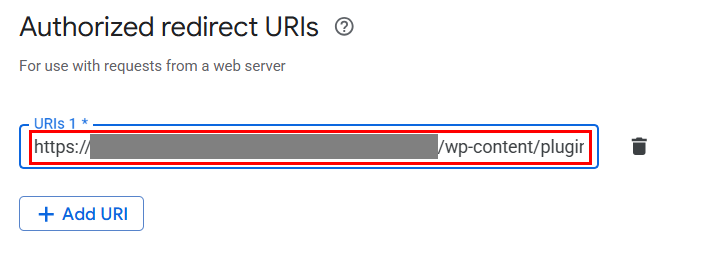
Now fill in a redirect uri. After authentication at Google is done, Google will redirect to this URL with a code that your application can use to obtain a access token. Look at the documentation of your application for the right value. In almost all cases a https-url is required here.
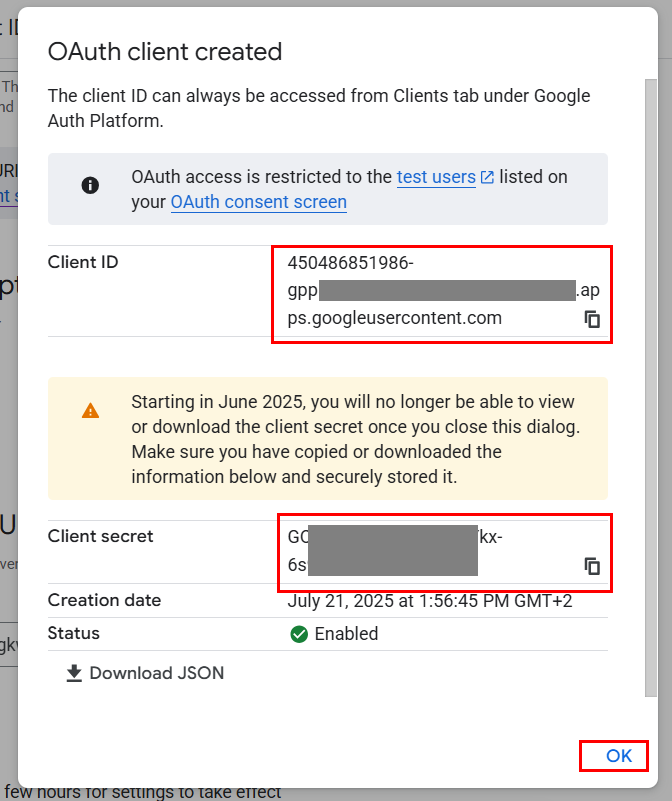
The client ID and secret are shown now, please save them on a secure place.
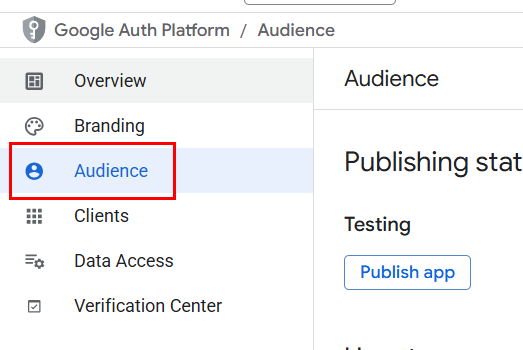
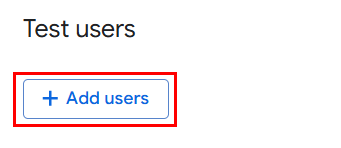
Click on Audience in the left menu.
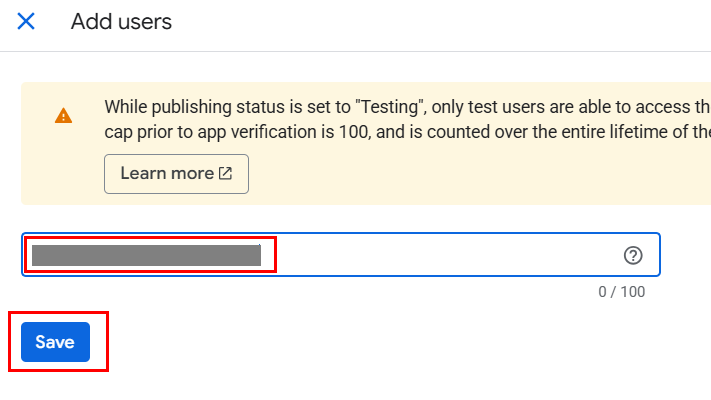
Because we don't have a reviewed and verified app for Google we need to allow all users that will obtain access token. Usually that is only you. Click Add user. When using an internal app for Google Workspace this step can be skipped.
Enter the e-mail address of a user that will obtain access tokens. This can be a personal Gmail or Google Workspace user.
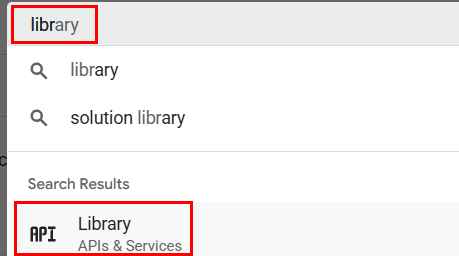
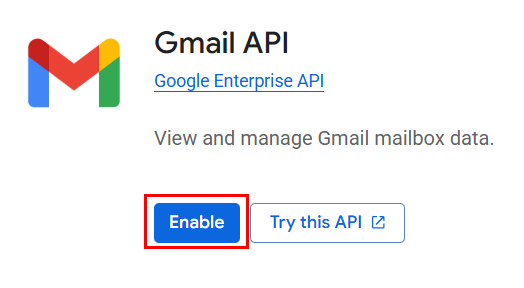
In the search bar in the top of the screen type: library and select the Library from APIs &emp; services.
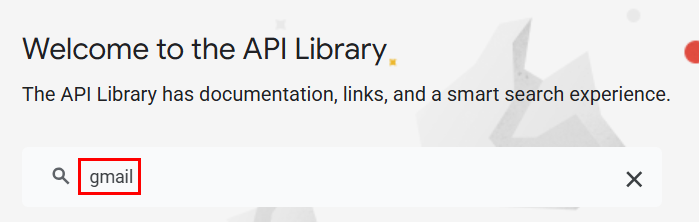
Search for Gmail in the library.
Enable Gmail.
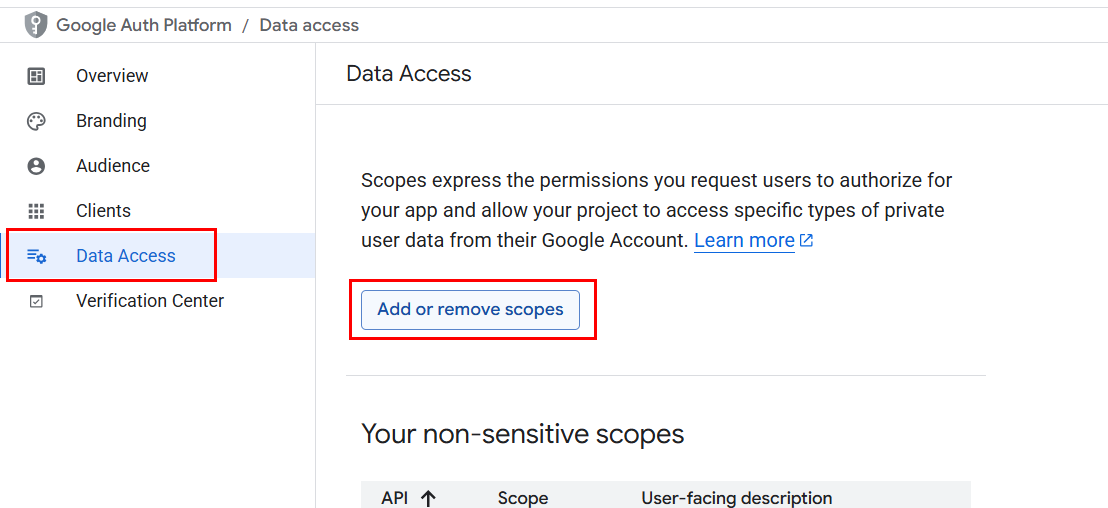
Go back to the Google Auth platform via the menu and choose Data access, click Add or remove scopes.
Search in the list for Gmail. Multiple results will be shown, look for the item with https://mail.google.com/, enable this one.
The client for authentication is ready to use. Beside the client id and secret you will need the following extra information to configure your application.
- Auth endpoint: https://accounts.google.com/o/oauth2/auth
- Token endpoint: https://oauth2.googleapis.com/token
- Scope: https://mail.google.com/
Obtaining an access and refresh token via cURL
To send mail your application needs to obtain an access token and refresh token. After expiring of the access token the refresh token can be used to obtain a new access token. The access token can be used inside the SMTP protocol and will expire shortly. Obtaining an access token is done by your application but for testing purpose you can do it outside the application.
Navigate in your browser to the URL given below. Replace <Client ID> with your client ID, in the abose steps allow for this test https://localhost/ as redirect URI
https://accounts.google.com/o/oauth2/auth?response_type=code&scope=https://mail.google.com/&access_type=offline&prompt=consent&client_id=<Client ID>&redirect_uri=https://localhost/
After completing the login and allowing approve access for the client application for sending mail you will be redirected. If you don't run a local webserver an error is thrown, this is normal. Look at the URL this will look like:
https://localhost/?code=4/0AVMBsJh8p8N1pPvY345vaPXAWLcsww7tDT-LZ-NXKPNmSNMJ-FXamSgD9K1wqIY06DA2kA&scope=https://mail.google.com/
The part between code= and &scope... is the code we need. In this example it is 4/0AVMBsJh8p8N1pPvY345vaPXAWLcsww7tDT-LZ-NXKPNmSNMJ-FXamSgD9K1wqIY06DA2kA.
Now open a terminal for exchanging this code for an access and refresh token. In this example we use cUrl but any modern http client can be used. The code is only valid for a limit time, don't wait to long.
curl https://oauth2.googleapis.com/token -d grant_type=authorization_code -d client_id=<Client ID> -d client_secret=<Client secret> -d code=<The code> -d redirect_uri=https://localhost/
When using cUrl in PowerShell enter the fullpath to the exe (c:\Windows\System32\curl.exe) because PowerShell will alias curl to Invoke-WebRequest.
The response should be and JSON response containing a token_type, expires_in and an access_token.
{
  "access_token": "ya29.a0AS3H6Ny_5cQ_pwmWkeQgTkOPbg1nTG39KyNZcDzdKEUEWo2mHbt51IZntMvEh_FX5r.......u2oRiTmG4hS7aCgYKAQYSARMSFQHGX2MibmML6coGXgbQeM9u0mgCKA0175",
  "expires_in": 3599,
  "refresh_token": "1//09YznrY4cCQE7CgYIARAAGAkSNwF-L9IrFseUjfdkZCchv_1sYH2fo...............dYZ36uMYU2Dm7Q8Y",
  "scope": "https://mail.google.com/",
  "token_type": "Bearer",
  "refresh_token_expires_in": 604799
}
The access token can be used inside the SMTP XOAUTH2 protocol. To exchange the refresh token for a new access token use the following cUrl command:
curl https://oauth2.googleapis.com/token -d grant_type=refresh_token -d client_id=<Client ID> -d client_secret=<Client secret> -d refresh_token=<The previous refresh token>
A response with same fields will be given containing a new access and refresh token.